How to install lwc337a on a mac or pc.
The EECS department seems to be unable to install the printer lwc337a on the departmental print server, but we have the following workarounds. Note that as of 6-17, we had to move this printer to an IRIS private network after it was seriously compromised and probably infected with the Hidden Cobra virus] (It's new name is 'print337a.1918..eecs.berkeley.edu'):
Mac
I. Go to System Preferences/Printers & Scanners and click the "+" sign and
Add Printer or Scanner.
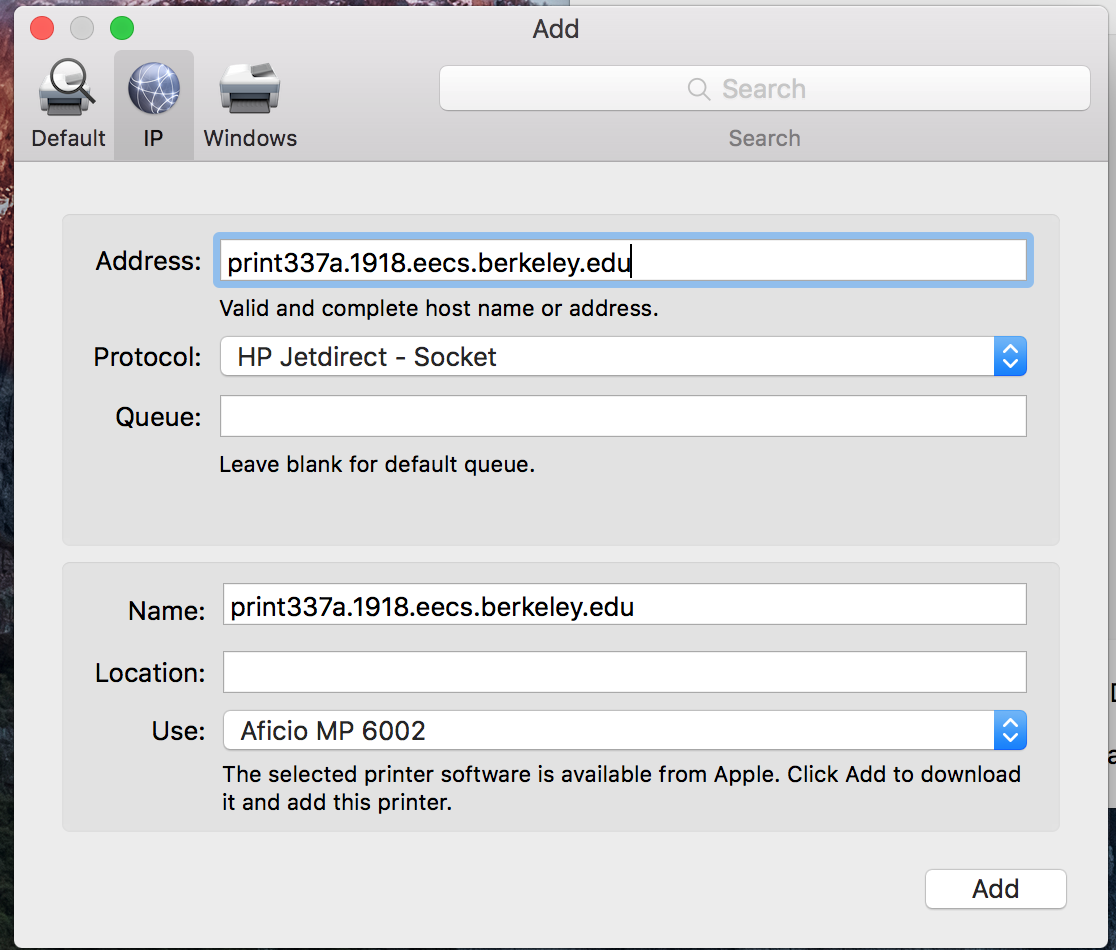
- Select IP in the upper left corner.
- In the Address: field type 'print337a.1918.eecs.berkeley.edu'. Alternatively, you can enter the ip address: '10.2.10.241'
- Select HP Jetdirect-Socket for the Protocol: field.
- In the Use: field, change Auto Select to Select Software.
- In the new window that then opens, scroll down to RICOH Aficio MP 6002 PS
- Change Name to print337a.1918.eecs.berkeley.edu
- Change Use: from AirPrint to RICOH Aficio MP 6002 PS, click Add and wait until the installation of the driver completes.
- Open the queue on the newly installed printer (print337A.1918.eecs.berkelely.edu) and select Print Test page under the Printer tab at the top of the window. Verify output.
<<<<<<<
>>>>>>>
PC
I. Go to Devices and Printers from the Start menu and click on Add printer.
- Choose Add a network, wireless or Bluetooth printer.
- In the next window you are asked to select a printer from the list. However, the Ricoh Aficio MP 6002 is not on the list. Instead, click The printer that I want isn�t listed.
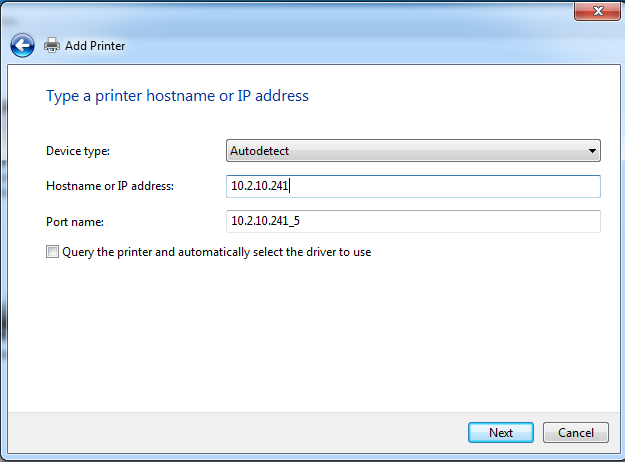
- When the next window opens, select Add a printer using a TCP/IP address or hostname and click next.
- Input the IP address (10.2.10.241) in the field labelled Hostname or IP address and uncheck the box labelled Query the printer and automatically select the driver to use. Then click next.
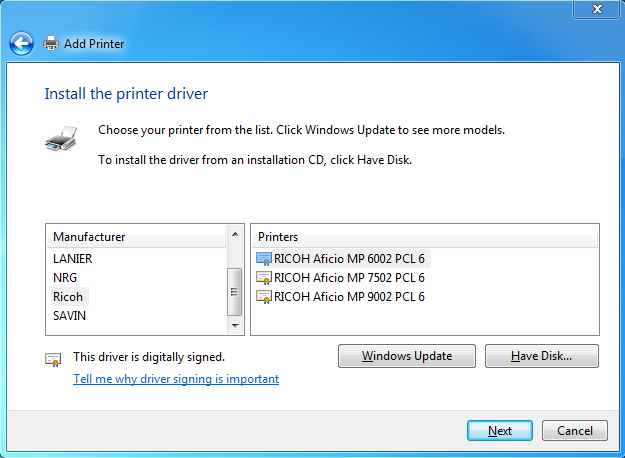
- The Add Printer window appears. Scroll to Ricoh/Ricoh Aficio MP6002 PCL6 and click next.
II. If it doesn�t find the driver, it will ask which network card you are using. Accept the default and a window appears where you select the Manufacturer (Ricoh) and Printer (RICOH Aficio 6002 PCL6).
- Click next again and rename the printer print337a.1918.eecs.berkeley.edu.
- The next page provides the opportunity to print a test page. Check that the printer has been successfully installed by printing a test page.
Troubleshooting
After moving the printer to the rfc 1918 network, it was not possible to print.
nmap showed:
bash-3.2$ nmap print337a.eecs.berkeley.edu
Starting Nmap 7.40 ( https://nmap.org ) at 2017-06-14 14:00 PDT
Nmap scan report for print337a.eecs.berkeley.edu (10.2.10.241)
Host is up (0.0023s latency).
Not shown: 995 closed ports
PORT STATE SERVICE
80/tcp open http
515/tcp open printer
7443/tcp open oracleas-https
8080/tcp open http-proxy
9100/tcp open jetdirect
Nmap done: 1 IP address (1 host up) scanned in 10.36 seconds
- Go to http://print337a.eecs.berkeley.edu and log in as admin
- Get the Printer Job History: Print Job/Stored File -> Printer: Print Jobs -> Go to [Printer Job History]
- The following appeared:
: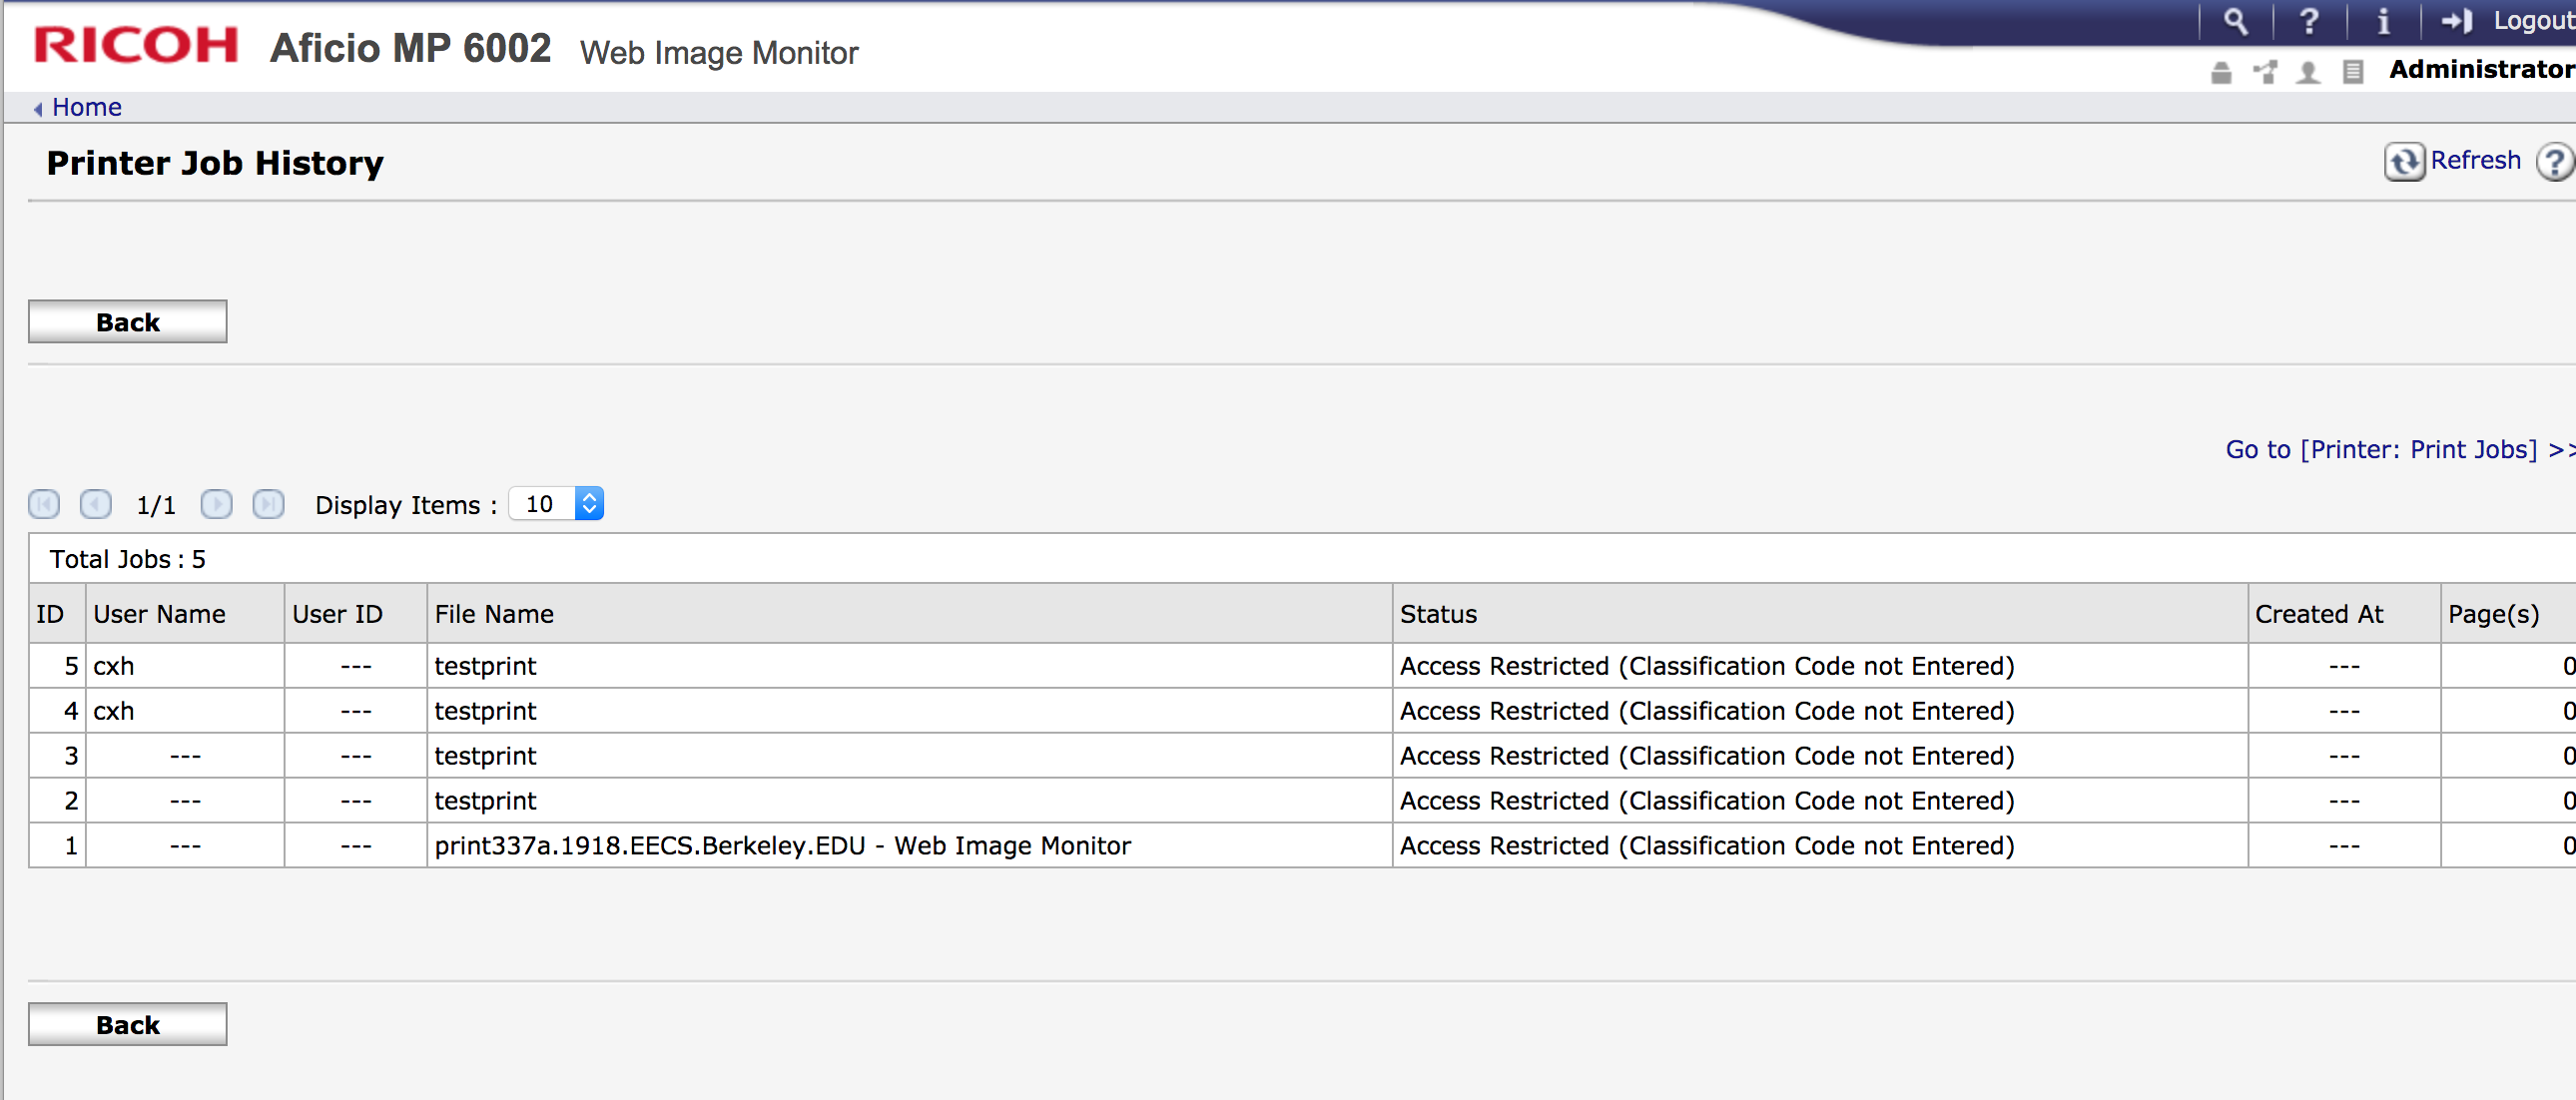
To fix Access Restricted (Classification Code not Entered),
- Google that message and find Specifying the Classification Code for a Print Job
- At the top, click on Registering Classification Codes
- At the bottom, click on Configuring Classification Codes, which says:
- Start Web Image Monitor.
- Click [Login].
- A dialog box for entering the login user name and login password appears.
- Enter the login user name and password, and then click [Login].
- For details about the login user name and password, consult your network administrator.
- Click [Configuration] in the left area, and then click [Logs].
- Check that [Required] or [Optional] is selected for [Classification Code] in the [Common Settings for All Logs] column.
- If "Required" is selected for the classification code requirement setting in Web Image Monitor, any print job that without a classification code specified will not be printed.
- Click [OK].
- Click [Logout].
- Quit Web Image Monitor.
Also, under Configuration->Device Settings->User Authentication Management, be sure that User Authentication Management is off
-